re:test
#44303
07/24/06 12:30 PM re:test
#44303
07/24/06 12:30 PM
|
Joined: Apr 2006
Posts: 2,415
5lights
 OP
OP
Super Wacko
|
|
OP
Super Wacko
Joined: Apr 2006
Posts: 2,415 |
[img]http:www.lighthousekeepers.com/uploads/files/eorreegramm@yahoo.com/Debatiriquois_edited.jpg [/img]
Debbie
|
|
|
|
Re: re:test
#44304
07/24/06 01:04 PM
|
Joined: Dec 1969
Posts: 13,047
Webmaster
Saint
|
|
Saint
Joined: Dec 1969
Posts: 13,047 |
I looked at your link and image. The name of the image had blank spaces which is not allowed (in typing your link, you left out the blank spaces.) I renamed it as "Deb_at_iriquois_edited.jpg" where it is stored. A second error in your link above. You have a space between the end of the name of the image and the left-bracket. No spaces between the brackets and the link enclosed. And a third problem - you left out the // after http: Fixing those three problems above, I come up with:  Chris, my son, saw a T-shirt in a catalog the other day that had a great big empty square with the 'red-x' broken link icon in the upper left corner. LOL Congrats you've got your first photo up! Almost everyone has problems their first time. The rest are easy! Now simply edit my reply (you won't be able to save it, but you can see it in the edit mode), copy the entire link from bracket to bracket. Open your message and paste this one over the other one. Here's a trick: open Notepad and paste the link in - delete just the name of the image and save that page somewhere where it is easy to find and open. Then when you upload future images to post, you can save typing and possible typos by opening that file, use CTRL-A to select all and then CTRL-C to copy it. Switch back the Forums and paste in that lead-in part of the link, just add the exact name of the picture. (no spaces in the names or the entire link. Case-senstive. No BMP images. Way To Go! For those others who are looking for help in posting pictures, here's Deb's first link: [img]http:www.lighthousekeepers.com/uploads/files/eorreegramm@yahoo.com/Debatiriquois_edited.jpg [/img] When your link displays in text instead of generating the picture OR the red-X, look for spaces between the brackets and the URL. If you get the red-x, look to see if you have the complete URL - could be missing the "http:" or the "//" or the "www." These are all critical for image links. But NOT for URL links (well the "www." is needed to automatically generate a link. HarbourLights.com vs. www.HarbourLights.com
|
|
|
|
Re: re:test
#44305
07/24/06 02:26 PM
|
Joined: Apr 2006
Posts: 2,415
5lights
OP
Super Wacko
|
|
OP
Super Wacko
Joined: Apr 2006
Posts: 2,415 |
John and Dave-thank you both SO much!!! Now I just need to master Brindfan's graemlins! 
Debbie
|
|
|
|
Re: re:test
#44306
07/24/06 02:30 PM
|
Joined: Apr 2006
Posts: 2,415
5lights
OP
Super Wacko
|
|
OP
Super Wacko
Joined: Apr 2006
Posts: 2,415 |
Debbie
|
|
|
|
Re: re:test
#44307
08/14/06 01:07 PM
|
Joined: Apr 2006
Posts: 2,415
5lights
OP
Super Wacko
|
|
OP
Super Wacko
Joined: Apr 2006
Posts: 2,415 |
Debbie
|
|
|
|
Re: re:test
#44308
08/14/06 01:30 PM
|
Joined: Dec 1969
Posts: 7,895
Dave H

Saint
|
|
Saint
Joined: Dec 1969
Posts: 7,895 |
Debbie, did you crop a picture and then increase the size? This may account for the graininess of the picture. I'm sure someone more knowledgeable may have other thoughts, but this is the most apparent to me.
|
|
|
|
Re: re:test
#44309
08/14/06 01:35 PM
|
Joined: Apr 2006
Posts: 2,415
5lights
OP
Super Wacko
|
|
OP
Super Wacko
Joined: Apr 2006
Posts: 2,415 |
I don't think I did. Maybe... I dunno! I'll restore it back to the original and fool with it some more. Have just started doing this and am having a devil of a time with getting the measurements right. 
Debbie
|
|
|
|
Re: re:test
#44310
08/14/06 01:37 PM
|
Joined: Apr 2006
Posts: 2,415
5lights
OP
Super Wacko
|
|
OP
Super Wacko
Joined: Apr 2006
Posts: 2,415 |
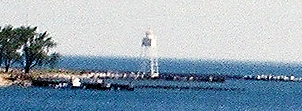
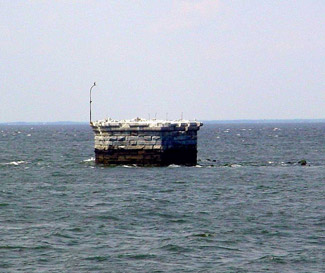
Dave-check out my Sturgeon Bay photo in the travel center...that seems to be a better effort?
Debbie
|
|
|
|
Re: re:test
#44311
08/15/06 11:29 AM
|
Joined: Apr 2006
Posts: 2,415
5lights
OP
Super Wacko
|
|
OP
Super Wacko
Joined: Apr 2006
Posts: 2,415 |
 I don't understand what the deal is-my pictures are fine until I crop them. Then they get grainy!
Debbie
|
|
|
|
Re: re:test
#44312
08/15/06 02:21 PM
|
Joined: Dec 1969
Posts: 7,895
Dave H
Saint
|
|
Saint
Joined: Dec 1969
Posts: 7,895 |
Debbie, are these digital pictures or scanned images? What are the dimensions (in pixels) before you crop?
|
|
|
|
Re: re:test
#44313
08/15/06 05:06 PM
|
Joined: Apr 2006
Posts: 2,415
5lights
OP
Super Wacko
|
|
OP
Super Wacko
Joined: Apr 2006
Posts: 2,415 |
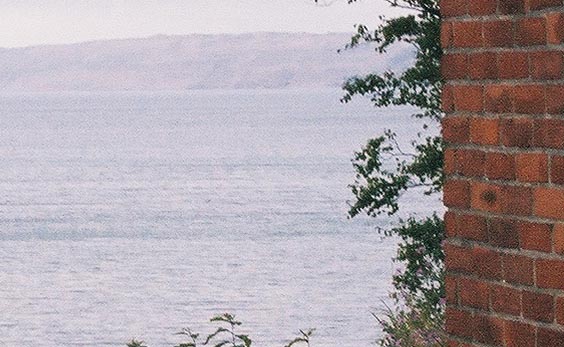
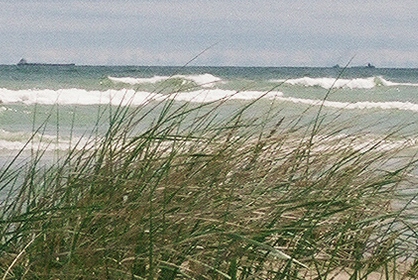
Dave they are from my 35mm camera that have been put on CD when developed. I then download them onto the computer. The one that I posted here with the grass, water, & ships...was 1800x1215. Is that what you want to know?
Debbie
|
|
|
|
Re: re:test
#44314
08/15/06 11:02 PM
|
Joined: Dec 1969
Posts: 7,895
Dave H
Saint
|
|
Saint
Joined: Dec 1969
Posts: 7,895 |
|
|
|
|
Re: re:test
#44315
08/15/06 11:41 PM
|
Joined: Apr 2006
Posts: 2,415
5lights
OP
Super Wacko
|
|
OP
Super Wacko
Joined: Apr 2006
Posts: 2,415 |
So....what am I doing wrong? They came out great for you! 
Debbie
|
|
|
|
Re: re:test
#44316
08/16/06 12:20 AM
|
Joined: Dec 1969
Posts: 7,895
Dave H
Saint
|
|
Saint
Joined: Dec 1969
Posts: 7,895 |
I used Photoshop Elements V2, but you should be able to do this with any editing program.
Always make sure you have a backup of the original file, either on your computer or preferably on a CD. (Debbie's pictures come as prints and a CD from the photo finisher.)
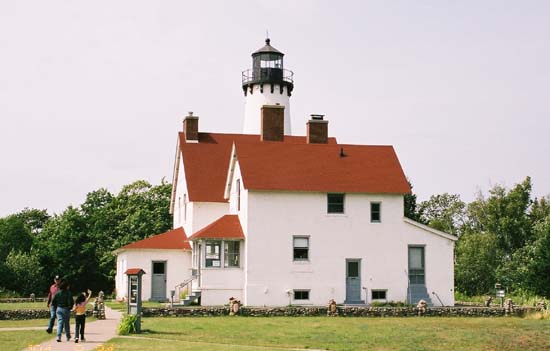
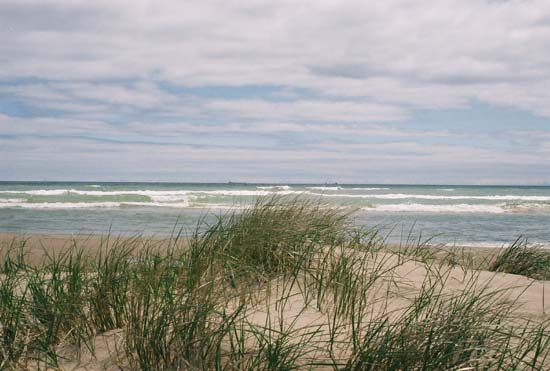
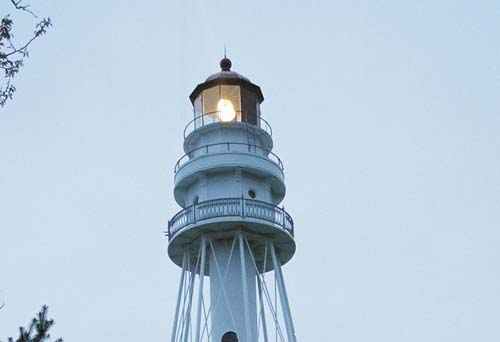
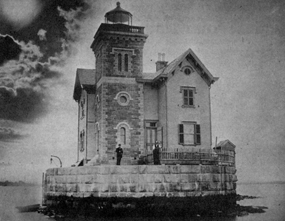
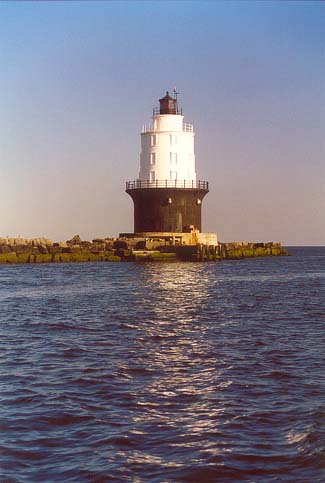
Starting with the full size file, make the crop you want to use just a portion of the overall image. For others following along, of these 3 images, the beach scene was not cropped; the lighthouse was mildly cropped; the lantern room was a more 'severe' crop - the original showed the entire tower.
Once I was satisfied with the crop, I resized the image. I tend to use somewhere between 500 and 550 pixels on the long side. DO NOT expand the image - e.g., if the image is 350 pixels on the long side after cropping, don't increase the size to 550.
When I save the image, Elements allows me to choose how much compression to apply. I usually pick the middle, 5 on a scale of 1 - 12.
When naming it, choose something that will make sense to you while keeping the length to a minimum. (I will use longer names for images destined to stay in inventory on the computer, shorter ones for what I plan to upload.)
Remember that uploaded images can not have any special characters other than - or _ in the name, and may not have any spaces. Actually, you will be able to upload these files, but you won't ever be able to link to them...
Sometimes the process seems challenging, but it really isn't when you learn the process. In this case, Debbie has had no problems uploading or linking / displaying after the first try. Her issue is that the images appear grainy. I have been trying to help her figure out why. I'm no expert at this, just the guy who gets to answer your questions when you ask for help. Other, better photographers and photo editors may have better ideas on what is causing the grainy appearance, but my initial thought is that somehow the size is being increased after cropping, just not sure how that is happening.
If you want to share your pictures and are 'stuck', give it a try and don't hesitate to ask for help. I generally don't bite, and will be glad to try and help anyone who is trying to post.
|
|
|
|
Re: re:test
#44317
08/16/06 10:50 AM
|
Joined: Dec 1969
Posts: 13,047
Webmaster
Saint
|
|
Saint
Joined: Dec 1969
Posts: 13,047 |
Thanks Dave for the step-by-step. Let me add a suggestion if you are using Photoshop Elements (latest version is 4.0). This is usually available for under $80 at Sam's Club and Costco. $99 at most stores. It has almost ALL the features of the $$$ version of Photoshop CS.
One that almost always gives a more pleasing result is "Auto Adjust".
If you don't like the results, you can always UNDO it.
When you are resizing your images, remember to FIRST set the resolution to 72 dpi. THEN resize it (but only smaller number, not larger, as Dave has said.)
You can protect your originals from being overwritten accidently by setting their property to "READ ONLY".
Select all the original images in a folder, then right-click on one of them, then choose Properties and check the box "Read Only".
|
|
|
|
Re: re:test
#44318
08/16/06 05:36 PM
|
Joined: Apr 2006
Posts: 2,415
5lights
OP
Super Wacko
|
|
OP
Super Wacko
Joined: Apr 2006
Posts: 2,415 |
Debbie
|
|
|
|
Re: re:test
#44319
08/16/06 05:38 PM
|
Joined: Apr 2006
Posts: 2,415
5lights
OP
Super Wacko
|
|
OP
Super Wacko
Joined: Apr 2006
Posts: 2,415 |
A little better...now have photo shop elements 4.0...need to work on it some I guess.
Debbie
|
|
|
|
Re: re:test
#44320
08/16/06 07:14 PM
|
Joined: Dec 1969
Posts: 7,895
Dave H
Saint
|
|
Saint
Joined: Dec 1969
Posts: 7,895 |
Just thought of something that can be a factor - in most of those photo disks that come back with your prints, there are two sets of digital images. A lo resolution and a hi res set. Usually in different sub-directories. Be sure that the ones you are using are the hi res version. (The ones you sent me were possibly the low res ones - two were at 72dpi, one at 96.) I believe you may do better starting with the hi res version, doing any touch up and then resizing/ changing the dpi at the same time. If this makes sense.
|
|
|
|
Re: re:test
#44321
08/16/06 07:15 PM
|
Joined: Apr 2006
Posts: 2,415
5lights
OP
Super Wacko
|
|
OP
Super Wacko
Joined: Apr 2006
Posts: 2,415 |
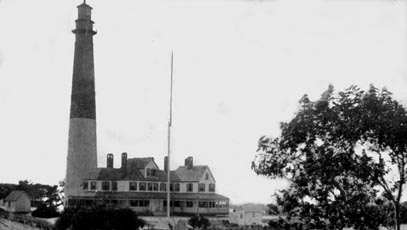
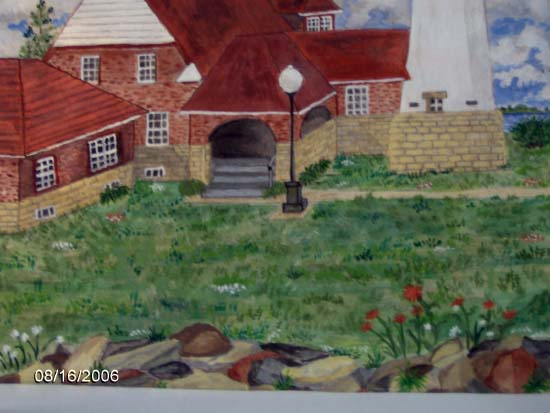 This is a crop of a painting that I did of Seul Choix Lighthouse.
Debbie
|
|
|
|
Re: re:test
#44322
08/16/06 07:51 PM
|
Joined: Dec 1969
Posts: 7,895
Dave H
Saint
|
|
Saint
Joined: Dec 1969
Posts: 7,895 |
I'd rather see the whole painting.......
|
|
|
|
Re: re:test
#44323
08/16/06 10:29 PM
|
Joined: Jul 2006
Posts: 701
grandmaR
Super Wacko
|
|
Super Wacko
Joined: Jul 2006
Posts: 701 |
Although it was mentioned -- I will crop the picture to the best visual of it, and save. Then when I resize, I save it with another name - in my case I find it easiest to put an s after the original name. So I 'save as', and if the original photo was 100_256.jpg, I save it as 100_256s.jpg
|
|
|
|
Re: re:test
#44324
08/16/06 11:32 PM
|
Joined: Apr 2006
Posts: 2,415
5lights
OP
Super Wacko
|
|
OP
Super Wacko
Joined: Apr 2006
Posts: 2,415 |
I will try and do the whole painting tomorrow if I have time. Thanks for the tip Rosalie and thank you Dave! 
Debbie
|
|
|
|
Re: re:test
#44325
08/17/06 01:26 AM
|
Joined: Apr 2006
Posts: 2,415
5lights
OP
Super Wacko
|
|
OP
Super Wacko
Joined: Apr 2006
Posts: 2,415 |
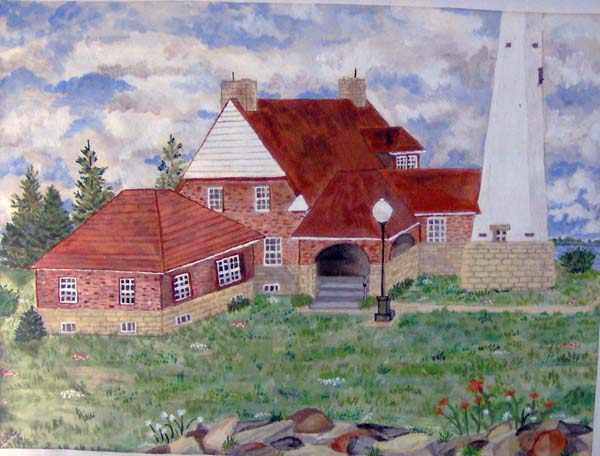 That's about as good as I can get it for now.
Debbie
|
|
|
|
Re: re:test
#44326
08/22/06 12:39 PM
|
Joined: Jul 2006
Posts: 7,152
Lighthouse Loon
Super Wacko
|
|
Super Wacko
Joined: Jul 2006
Posts: 7,152 |
Stan M
New Jersey Lighthouse Lovers
------------------------------------
Harry Wishlist: Tinicum Rear Range, Miah Maull Shoal, Finns Point, Bergen Point, Cross Ledge, Old Ambrose Lightstation, Romer Shoal, Barnegat Lightship, Liberty Lightship.
|
|
|
|
Re: re:test
#44327
08/22/06 12:56 PM
|
Joined: Dec 1969
Posts: 7,895
Dave H
Saint
|
|
Saint
Joined: Dec 1969
Posts: 7,895 |
Sent you a note about why the first image didn't display.
|
|
|
|
Re: re:test
#44328
08/24/06 09:40 AM
|
Joined: Jul 2006
Posts: 7,152
Lighthouse Loon
Super Wacko
|
|
Super Wacko
Joined: Jul 2006
Posts: 7,152 |
Testing adding url test point
Stan M
New Jersey Lighthouse Lovers
------------------------------------
Harry Wishlist: Tinicum Rear Range, Miah Maull Shoal, Finns Point, Bergen Point, Cross Ledge, Old Ambrose Lightstation, Romer Shoal, Barnegat Lightship, Liberty Lightship.
|
|
|
|
|
Forums39
Topics16,980
Posts184,643
Members2,583
| |
Most Online10,155
Jan 14th, 2020
|
|
|
1 registered members (Rock),
942
guests, and 8
spiders. |
|
Key:
Admin,
Global Mod,
Mod
|
|
|